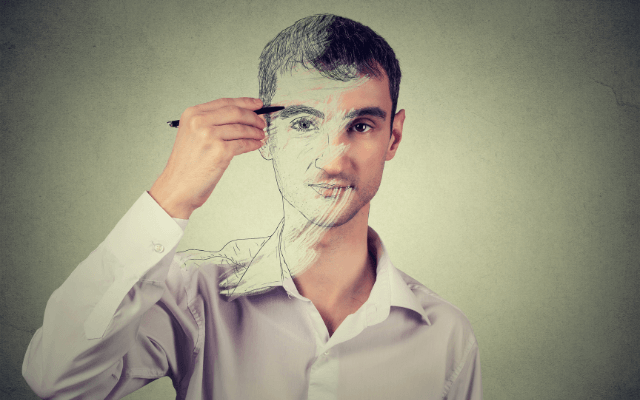
How to draw a male body for beginners
Have you ever been captivated by a powerful figure drawing and thought, “I wish I could do that”? Well, guess what? You can! Contrary to popular belief, capturing the human form on paper isn’t just for the artistically gifted or for 3d porno gay artists. It’s a skill anyone can develop with practice and the right guidance.
This guide is here to be your compass on that journey, specifically focusing on the fundamentals of drawing the male body. We’ll break down the process into easy-to-follow steps, using basic shapes and clear instructions to help you build a solid foundation in figure drawing.
So, grab your pencil, unleash your inner artist, and let’s get started!
Proportions & Basic Shapes: Building the Framework
The key to a believable figure drawing lies in proper proportions. Just like a building needs a strong foundation, your drawing needs a well-structured framework to ensure the final product looks realistic and balanced.
Here’s where our trusty friends, basic shapes, come into play! We’ll use circles, ovals, rectangles, and lines to construct the basic structure of the male body. Don’t worry, these shapes will soon transform into a recognizable human form.
Step 1: Head & Torso
- Head: Begin by drawing a circle. This will represent the head.
- Torso: Imagine a long oval slightly wider than the head. Draw this oval slightly below the circle, connected by a short line for the neck.
Pro Tip: Imagine dividing the entire body into eight equal sections. The head will typically be one of these sections in height.
Step 2: Hips & Legs
- Hips: Below the torso, draw another, slightly narrower oval tilted slightly forward. This represents the hips.
- Legs: From the bottom of the hips, draw two straight lines down for the legs. The length of these lines will determine the overall proportions of your figure. As a general rule, adult male legs are typically about three and a half to four times the length of the head.
Step 3: Arms & Shoulders
- Shoulders: From the top of the torso (oval), draw two diagonal lines extending outwards. These lines represent the shoulders. The width of these lines will influence the overall size and posture of the figure. Broader shoulders will create a more muscular look.
- Arms: From the ends of the shoulder lines, draw short lines down for the upper arms.
Remember: These are just guidelines! Don’t be afraid to experiment with proportions slightly to create different body types.
Breaking Down the Body: Key Areas
Now that we have the basic framework, let’s refine it by focusing on some key areas of the male body.
The Neck & Chest
- The neck acts as a bridge connecting the head and torso. Refine the initial neck line by adding two diagonal lines on either side, creating a slight V-shape.
- The chest area sits beneath the collarbone (represented by a curved line connecting the shoulders). Here, you can use subtle curves to suggest the underlying musculature.
The Core & Hips
- The core is the center of the body, housing important muscle groups. Define this area by adding a slight inward curve at the bottom of the torso’s oval.
- The hips connect the torso to the legs. Refine the hip oval by adding a slight curve inwards at the top and bottom, creating a more natural shape.
Pro Tip: Throughout this process, keep referring to reference images of male anatomy. This will help you visualize the placement and shapes of muscles and body parts.
Adding Details: Bringing it to Life
With the basic structure and key areas defined, it’s time to add details that bring your figure drawing to life!
Facial Features:
- Eyes: Draw two small circles within the head circle, positioned slightly off-center and closer to the top half.
- Nose: Below the eyes, add a simple triangle pointing downwards.
- Mouth: A short horizontal line can represent the mouth initially. This can be adjusted later depending on the desired expression.
Hands:
Hands can be tricky, but we can simplify them using basic shapes. Imagine a trapezoid for the palm and add short lines for fingers. Don’t worry about intricate details yet – focus on capturing the overall proportions.
Muscles:
Remember those subtle curves we added earlier? Now, we can use them as a foundation to suggest basic muscle definition. Don’t go overboard with details at this stage.
Refining Lines & Adding Shadow
- Replace your initial construction lines (circles, ovals) with smoother, more confident lines to define the final figure.
- Consider adding light shading to create a sense of depth and dimension. Use a light pencil and focus on areas like the chest, core, and the space between the legs for a subtle effect.
Action & Pose: Adding Dynamism
So far, we’ve focused on a static pose. But the beauty of figure drawing lies in its ability to capture movement and emotion.
Here’s a glimpse into how we can add dynamism to our figures:
- Adjusting the Basic Shapes: Remember those circles and ovals used for the framework? By tilting or bending these shapes slightly, you can create different poses. For example, tilting the torso forward suggests a walking motion.
- Limb Angles & Movement: Experiment with the angles of the arms and legs to depict different actions. Bent elbows and knees can suggest running or jumping, while straight limbs create a more static pose.
Pro Tip: Reference photos of people in various poses for inspiration. Pay close attention to how the body twists and bends with movement.
Conclusion
Congratulations! You’ve now grasped the fundamentals of drawing the male body. Remember, this is just the beginning of your artistic journey.
Here are some key takeaways:
- Proportions are key: A well-proportioned figure creates a sense of realism.
- Basic shapes are your allies: Use circles, ovals, and rectangles to build the framework.
- Focus on key areas: Refine areas like the neck, chest, core, and hips for a natural look.
- Start simple, then add details: Don’t overwhelm yourself with intricate details initially.
- Practice is essential: The more you draw, the more comfortable and confident you’ll become.
Bonus Tip: Resources for Further Exploration
Feeling inspired? Here are some resources to help you on your artistic path:
- Online tutorials by professional figure artists
- Anatomy reference books for artists
- Life drawing classes (once comfortable, consider attending life drawing sessions to practice drawing from real models)
Remember, there’s no single “right” way to draw. Experiment, have fun, and most importantly, enjoy the process of creating!